MIL-DTL-18001L
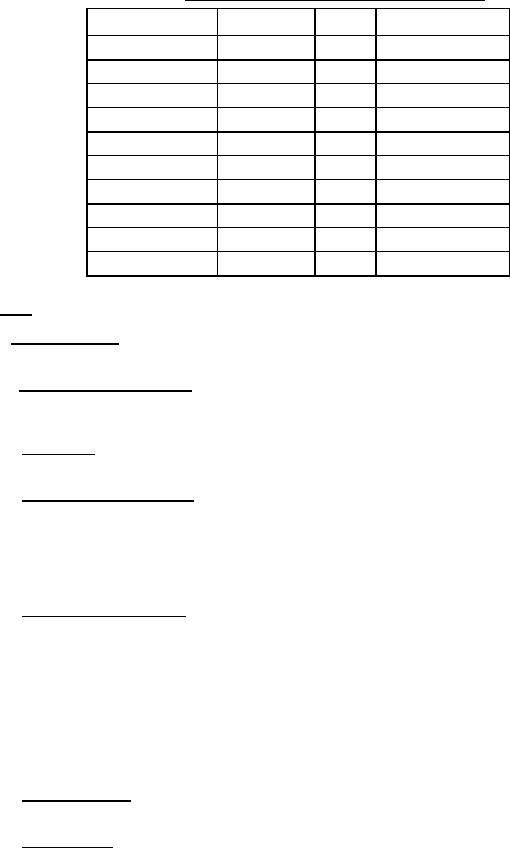
TABLE III. Sampling for visual and dimensional examination.
Lot size
Sample size
Accept
Reject
2 � 25
3
0
1
26 � 50
5
0
1
51 � 90
6
0
1
91 � 150
7
0
1
151 � 280
10
0
1
281 � 500
11
0
1
501 � 1200
15
0
1
1201 � 3200
18
0
1
3201 � 10,000
22
0
1
10,000 and over
29
0
1
4.3 Tests. The following tests shall be performed.
4.3.1 Core bonding test. One of the following core bonding tests (4.3.1.3 or 4.3.1.4) shall be performed on
each anode selected in accordance with 4.3.1.1.
4.3.1.1 Sampling for core bond tests. From each lot specified in 4.1.1, two anodes shall be selected at random
of Types ZHS, ZHB, ZHC, ZSS, ZBS, ZTS, ZEP, ZMP, and ZBP and five anode discs of Type ZDM for the test
specified.
4.3.1.2 Resampling. In cases where one of the two anodes tested failed to pass the core bond test, four
additional anodes may be selected for retest at the direction of the manufacturer.
4.3.1.3 Core bonding test procedure. Each anode selected to represent the lot shall be cut along the axis of each
strap or core, and the cut surface shall be ground reasonably smooth. These surfaces shall be polished with a
240-mesh emery abrasive until the zinc-strap interface is distinctly visible. At least 30 percent of this interface shall
show no separation when examined at approximately 10 times the magnification. Zinc anodes may have a bead or
buttress projecting from the anode edge along the strap not exceeding � inch (6.35 millimeters). Less bond between
core and zinc than specified herein shall be cause for rejection of the lot.
4.3.1.4 Alternate core bonding test. Using any suitable method, the cores shall be torn from each anode
selected to represent the lot. The use of a sledge hammer to break the zinc away from the cores has been found to be
satisfactory. The area showing bond shall be established by visual inspection of the portion of the cores which were
contained within the anode. The metallurgical bond between the zinc and the core shall be at least 30 percent of the
total surface area of each core in contact with the zinc of the anode. For the purpose of determining the surface area
of the encased core in the anode, marks shall be scribed on the strap around the periphery of each anode at locations
where the straps protrude from the anode. The total area of the strap shall be computed between the scribe marks.
The surfaces shall have a smooth grey matte finish where bonding has been adequate and either a shiny metallic or
rough, dark, or discolored finish where bonding has been inadequate. Both core and zinc mating surfaces shall be
examined. Less bond between core and zinc than that specified herein shall be cause for rejection of the entire lot.
4.3.1.5 Type ZDM anode. A minimum steady pressure of 750 pounds (340 kilograms) from a hand-operated
pen press applied axially shall be required to remove the core from the anode.
4.3.1.6 Sample anodes. Sample anodes shall be discarded and not included in the delivery of material after the
core bond tests are performed. The remaining lengths of ZRN and ZPN anodes may be included in the delivery of
material after the physical tests of 4.3.3. Sampling for chemical analysis, as specified in 4.3.2.1, shall be made prior
8
For Parts Inquires call Parts Hangar, Inc (727) 493-0744
© Copyright 2015 Integrated Publishing, Inc.
A Service Disabled Veteran Owned Small Business